Create all kinds of tailored content with custom fields
Reap the full potential of your custom post types
Earlier this week, we walked you through how to create a custom post type in your WordPress theme. This was great for having multiple feeds on your site – whether that’s movie reviews or, in our case, products. In this post, we’re going to expand on that topic some more. To be specific, we’re going to walk you through how to add custom fields to those custom post types.
Fields simply add more information, or metadata, to your posts. See the title of this blog post? That’s a field that WordPress automatically comes with. The date, author, and other similar elements are all fields that WordPress takes care of, too. Custom fields allow you to add even more metadata to your posts. The capabilities of this are pretty limitless. A custom field can be a thumbnail image associated with the post, a star rating on a movie review, the current weather, or even related videos. For our example, we’re going to stick with our products custom post type, and show you how to add two custom fields: price and stock availability.
Adding custom fields
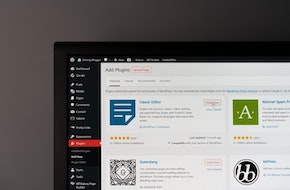
It’s not hard to add any number of custom fields to your post. The first step, when you’re in your WordPress dashboard, is to click on the “Screen Options” button in the top right of your screen. In that dropdown, be sure that the “Custom Fields” box is checked. Now, when you’re making a new post, you should be able to see a Custom Fields area below the main content area for your post.
In that box, all you have to do is give your custom field a name and a value. The name is how we’ll reference the field in our code, so for our price field, let’s name it “product-price.” Then, the value is what will be displayed. That’s where the actual price of whatever we’re selling will go – like “$25.”
Easy enough! Now we’ll move on to our stock availability custom field. We could set it up the same as price, naming it “product-stock” and giving it a value of something like: “This product is in stock!” However, that seems like a hassle to change and manage every time we have a stock update. And what if we decide we want to change our stock messages? We’d have to go into every single product post!
Instead, let’s download the plugin Advanced Custom Fields. This allows for many more options in for our custom fields, where all of the hard coding is done for us. There are several other plugins that can do the same job, too. But this means we can set up the custom field as a radio button, whether it’s “In Stock” or “Out of Stock.” Then we can give each button a value that applies globally, and even style the two potential values differently on the website. Very handy!
Making those fields show up on your posts
This is where the coding comes in, but don’t worry, it’s not too intensive. All we have to do is go to our single-product.php file, and make sure the page grabs and displays the custom field metadata. In that file, we need to find the WordPress loop, which looks something like the code below.
<?php if ( have_posts() ) : while ( have_posts() ) : the_post(); ?>
    //  Your Code/Content Here
<?php endwhile; else: ?>
<?php endif; ?>
This is the code that makes the post display. Since we want our product’s price and availability to show up with the post, we’ll add in some code referencing the new custom fields before the ending tags. For our two custom fields, the code will look like this:
<?php if ( have_posts() ) : while ( have_posts() ) : the_post(); ?>
    //  Your Code/Content Here
    <div class="product-price">
        <p>Price: <?php echo get_post_meta($post->ID, 'product-price', true); ?></p>
    </div>
    <div class="product-stock">
        <p>This item is: <?php echo get_post_meta($post->ID, 'product-stock', true); ?></p>
    </div>
<?php endwhile; else: ?>
<?php endif; ?>
With that new php code, our custom fields will display right below the post content. Fantastic! Depending on where we put that code, we can get the information to show up wherever we want on the product post page. Plus, with the divs and their classes, it will be easy to style these custom fields with CSS to our heart’s content. So there you have it! Custom fields for your custom post types have never been so easy.